


There’s something magical about curling up under a handmade quilt.
The feel of fabric, the warmth it provides, and the stories it contains can transform a chilly evening into something special.
Recently, I decided to take on a new challenge and try my hand at creating the Starry Night Quilt.
I’ve always been captivated by its enchanting design, and it felt like the perfect project to dive into during those cozy weekends.
As I started working on the Starry Night Quilt, I realized just how therapeutic quilting can be.
The rhythmic motion of cutting, sewing, and piecing together fabric made me feel as though I was crafting not just a quilt but a tapestry of memories.
Each patch tells a story, and as I stitched, I let my mind drift to thoughts of serene nights gazing at the stars.
Today, I want to share how you can create your very own Starry Night Quilt!
Unlock the Charm of the Starry Night Quilt
The Starry Night Quilt is more than just a colorful fabric creation; it’s an artistic expression that captures the beauty of the night sky.
This pattern’s playful constellations and lively color palette add a whimsical touch to any space.
Whether you’re looking to beautify your living room or crafting a heartfelt gift, the Starry Night Quilt is sure to impress.
Plus, it empowers you to play with colors, patterns, and techniques, making it a great choice for quilters of all skill levels.
The aesthetic appeal of the Starry Night Quilt is undeniable, but what really makes it special is the intricate piecing technique involved.
As I learned about the various blocks in the quilt, I was thrilled to discover how each section required different cutting and sewing methods that allowed my skills to grow with each stitch.
If you’ve been searching for a project that can elevate your quilting game, look no further than the Starry Night Quilt!
Gather Your Materials for the Starry Night Quilt
- Fabrics: Various colors (including dark blues, light blues, whites, and yellows).
- Quilt backing material: A soft fabric adds comfort.
- Batting: For padding and warmth.
- Quilting thread: Durable and in a contrasting or coordinating color.
- Rotary cutter: For precise cutting.
- Cutting mat: Protects your work surface.
- Quilting ruler: For accurate measurements.
- Sewing machine: Ideally with a walking foot for quilting layers together.
- Iron and ironing board: Pressing your seams for a neat finish.
- Safety pins or basting spray: To hold layers in place while quilting.
Before diving in, it’s crucial to prepare your workspace!
Lay out all your materials so that everything is at your fingertips.
A clean, organized area will help you keep your motivation high.
Additionally, it can also be beneficial to pre-wash your fabrics before cutting to prevent any shrinkage later on.
This little step can make a world of difference in the final look of your Starry Night Quilt.
Make sure to double check your cutting tools as well!
A well-maintained rotary cutter will give you crisp, clean edges that are essential for precise piecing.
A dull blade can lead to frustration and negatively affect the overall aesthetic of your Starry Night quilt.
Trust me; spending a few minutes on tool prep is well worth the time!
Let’s Get Stitching!
Instructions to Create the Starry Night Quilt
Alright, quilting aficionados!
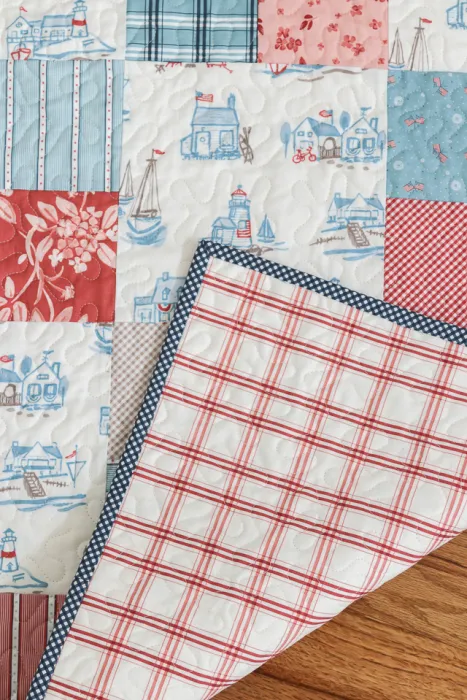
Below is your sneak peek into the step-by-step process for making the beloved Starry Night Quilt.
Detailed instructions follow the image, and you can view the full pattern via the provided link.
Let’s jump into this sparkly journey!
Full Pattern: Click Here
Additional Tips for Your Quilting Journey
As you work on your Starry Night Quilt, feel free to express your personal style!
Don’t be afraid to swap colors or patterns to create a unique version that resonates with what’s close to your heart.
Remember, quilting is a journey, and each stitch holds your creativity and passion.
Also, consider keeping a small notebook handy to jot down your ideas and equations as you go.
You might just come up with designs for future projects!
Another tip I found helpful was to take breaks.
Quilting can be a bit physically demanding and it’s easy to get lost in your work.
Stand up, stretch, and take a sip of your favorite beverage.
This allows your mind to refresh, helping you stay focused and excited about every step of crafting your Starry Night Quilt!
Embracing Your Unique Creation
One advanced technique that truly stood out to me while working on the Starry Night Quilt was the method of free-motion quilting.
This allows you to add your own swirl patterns, mimicking the curves of the stars and night sky.
It was both challenging and rewarding and even if it doesn’t turn out perfect, it’s all part of the creation process!
Be bold and try out different quilting techniques!
Each added layer or design you incorporate helps to add depth and personality to your Starry Night Quilt.
Remember, perfection isn’t a requirement—embracing the imperfections adds to the charm of your creation!
Celebrate Your Creative Experience
By completing the Starry Night Quilt, you’ve not only created a beautiful piece but also a memory that encapsulates hours of dedication, creativity, and joy.
Quilting isn’t just about the final product; it’s about enjoying the crafting process and celebrating your accomplishments along the way.
Whether it adorns your home or is gifted to a loved one, it’s truly a masterpiece!
If you’re eager to dive into more amazing content, you’re in luck!
This blog is filled with vibrant projects and tips that will ignite your creativity.
I’ve prepared an incredible piece you can explore right here.
Let’s keep this creative spark alive together!
So let your imagination fly as you craft your very own Starry Night Quilt.
I can’t wait to see what you create!


