


When I first discovered quilting, I didn’t realize just how much it would feed my creative spirit.
The thrill of transforming a stack of fabric into a vibrant, functional piece of art was a game-changer for me.
It felt almost magical, like I was weaving together threads of happiness.
That’s exactly how I felt when I stumbled upon the Starburst Quilt pattern.
The burst of colors, the geometric simplicity, and its ability to stand out in any room was exactly what my creative heart craved.
As someone who’s always loved crafts, the Starburst Quilt was a refreshing challenge.
I remember the first time I laid out my fabric—each selection brought me closer to the stunning quilt I envisioned.
It wasn’t just about creating a cozy blanket; it was about pouring myself into each piece, making it uniquely mine.
Today, I want to share my love for the Starburst Quilt with you and guide you through the process of creating your very own masterpiece!
Design Inspiration and Patterns
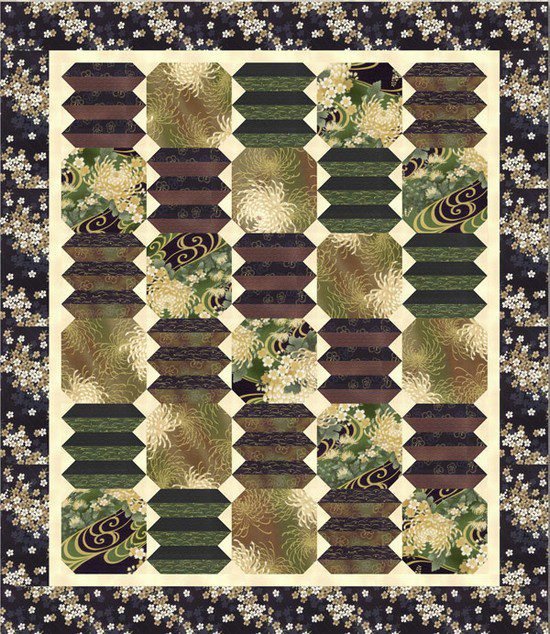
The Starburst Quilt stands out for its unique design that plays with geometric shapes, creating an explosion of color and texture.
This quilt is perfect for showcasing those beautiful fabrics you’ve been saving for a special project.
I love choosing contrasting colors to enhance the starburst effect, making each star pop against its background.
Whether you’re drawn to pastels or bold primary colors, the Starburst Quilt’s design allows for endless creative choices.
This design isn’t just pretty; it serves a purpose too!
Quilting often feels like putting together a puzzle—the excitement of seeing everything fit together while expressing yourself artistically.
The Starburst Quilt aligns perfectly with this idea, as it combines both aesthetics and technique, making it a joy to work on.
Taking the First Steps
Before diving into making the Starburst Quilt, gathering your materials is crucial.
The preparation phase can be both exciting and a bit overwhelming, especially if you’re eager to begin.
Trust me, taking the time to prep will make your quilting experience much smoother.
It’s also an opportunity to lay out your vision, planning the arrangement of colors and patterns that truly speak to you.
Be sure to choose fabrics that complement each other without clashing.
You don’t want to end up with something that feels disjointed!
I recommend selecting a focal fabric and then choosing supporting colors that add depth and interest to your Starburst Quilt.
Materials
- 1 layer cake (40 squares of fabric, 10” x 10”)
- 1 3/4 yards of background fabric
- 1/2 yard for the binding
- 3 yards of fabric for the backing
- Rotary cutter and mat
- Quilting ruler
- Sewing machine and threads
- Iron and ironing board
Let’s Get Started!
Ready to create your stunning Starburst Quilt?
You’re in for a treat!
Below, I’ll walk you through the step-by-step instructions.
Remember to take your time; quilting is all about joy and creativity, not just speed.
If you need the full pattern for this quilt, just follow this link!
Full Pattern: Click Here
Additional Tips for Success
As you start sewing the pieces together for your Starburst Quilt, don’t stress if things don’t align perfectly the first time!
Quilting is all about making adjustments and learning as you go.
Use your seam ripper as your best friend when needed, because trust me, even experienced quilters make mistakes!
It’s all part of the fun.
Don’t forget to press your seams as you go.
Pressing can make a significant difference, especially for this pattern where the seams must lay flat to ensure that each star shines in its full glory.
This will keep your quilt looking sharp and well-made!
Exploring Advanced Techniques
As you get more comfortable with the Starburst Quilt, consider experimenting with additional techniques to elevate your quilt’s look.
For instance, using a decorative stitch can add a unique flair to your piecing, or even consider adding some applique for a personal touch.
The possibilities are as vast as your creativity!
Additionally, playing around with the quilting design itself can also enhance the overall appearance of your Starburst Quilt.
Whether you choose to do a simple stitch-in-the-ditch or a more advanced free-motion pattern, every detail contributes to the beauty of your finished piece.
Celebrate Your Creation!
When you finally stitch that last seam and step back to admire your finished Starburst Quilt, let yourself feel proud!
You’ve poured your creativity and energy into each stitch, and now you have a breathtaking quilt to show for it.
This project is not just a blanket; it’s a symbol of your journey through creativity and patience.
If you loved this tutorial and want to keep the inspiration flowing, I encourage you to explore more articles on my blog!
There’s a treasure trove of quilting tips and tricks waiting just for you.
Don’t miss out on an incredible piece I’ve prepared that you can discover by diving deep here.
Happy quilting, friends!


