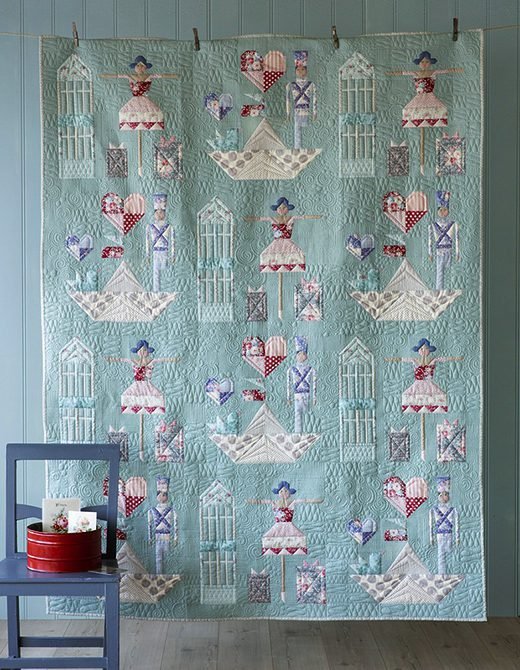
When I first discovered the Brave Tin Soldier Quilt, it felt like stumbling upon an enchanting world of fabric and storytelling.
This quilt isn’t just a lovely patchwork of colors; it’s a heartwarming tribute to Hans Christian Andersen’s tale of the steadfast tin soldier and his delicate ballerina.
As I soaked in the story’s rich themes of love and bravery, I couldn’t help but imagine how breathtaking it would be to recreate this masterpiece with my own hands.
Let me tell you, there’s something magical about stitching together emotions and memories, and this particular quilt evokes a sense of nostalgia that’s hard to resist.
Fueled by inspiration, I decided that I had to create my own version of the Brave Tin Soldier Quilt.
I hadn’t done anything quite like it before, and I was a little apprehensive about tackling the intricate design.
However, the thrill of immersing myself in such a timeless story compelled me onward.
With every square cut and stitch sewn, I felt more connected to the characters and their journey.
I can’t wait to share my experience with you!
Design Inspiration: Weaving the Tale into Fabric
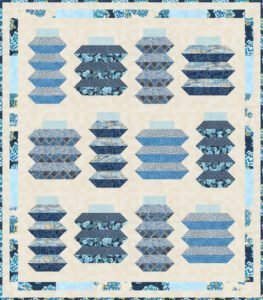
The Brave Tin Soldier Quilt consists of two distinctive blocks: the ballerina and the soldier.
Together, they weave an intricate tapestry of the story through motifs like the ballerina’s castle and the soldier’s jacket.
The charming layout of this quilt, arranged as a 3×4 grid, acts as a visual storytelling medium, allowing quilters like me to display not just craftsmanship but also narrative depth.
With each fabric placement, you can inject a unique blend of character and color.
Using a mixture of solid and patterned fabrics brings about an excellent exploration of textures, creating a visual feast that reflects the vibrant world of the story.
Preparing this quilt is not only about following patterns—it’s about embracing the spirit of love and courage that defines the Brave Tin Soldier Quilt.
I often found myself smiling as I pieced together both blocks, thinking of how these characters love each other despite the odds they face.
Gathering Essentials: What You’ll Need
- Fabric 1 (solid blue sage for sashing): 4½ yards
- Fabric 2 (solid warm sand): ⅛ yard
- Fabric 3 (solid dusty rose): 7” square
- Fabric 4 (solid lupine): ⅛ yard
- Various patterned fabrics (Fabrics 5-27): Refer to the original materials list for specific cuts and colors
- Backing fabric: 4⅞ yards
- Binding fabric: ⅝ yard (Sophie teal)
- Wadding (batting): 67” x 86”
- Other tools: Quilter’s ruler, rotary cutter, removable fabric marker, thick card for appliqué templates, black embroidery floss
- Finished quilt size: 59” x 78” (after binding)
Preparation: Setting the Stage for Magic
Before diving into the Brave Tin Soldier Quilt, I found it crucial to get organized.
Clearing a dedicated space to work allows your creativity to flow and makes the whole process more enjoyable.
I recommend gathering and pre-cutting your fabric before beginning—you’ll thank yourself later!
Every quilter knows that preparation is key, and this quilt comes with numerous pieces to manage.
Aside from cutting, make sure you have all tools on hand, from rulers to markers.
Having everything within reach saves time and minimizes those pesky interruptions.
I also found it helpful to refer to the original pattern often; it keeps me on track and reminds me of the overall aesthetic I want to achieve with the Brave Tin Soldier Quilt.
Ready, Set, Sew!
Alright, quilt enthusiasts!
Below, you will find exciting step-by-step instructions on how to assemble the Brave Tin Soldier Quilt.
To delve into the full pattern with all its richness and detail, check out the link provided beneath the image!
Full Pattern: Click Here
Helpful Hints: Make Your Journey Smoother
Throughout my quilting adventure, I’ve gathered a few nuggets of wisdom that I’d love to share.
Firstly, marking your seams can significantly improve the overall look of your blocks.
Using a removable fabric marker allows you to take your time ensuring alignment is perfect, especially on those angled pieces!
Trust me, precision matters!
Additionally, keep things organized.
Since the Brave Tin Soldier Quilt involves numerous small pieces, I recommend setting up labeled piles.
This simple method can save you lots of valuable time and reduce frustration later—believe me, it’s a game changer!
Diving Deeper: The Art of Appliqué
One of the most charming aspects of the Brave Tin Soldier Quilt is the appliqué techniques used within the design.
While some might shy away from intricate detailing, I’ve discovered that taking it slow and patient pays off beautifully.
The small appliqué circles for the characters’ cheeks add such heartfelt expression!
When working on the appliqué, ensure to press them out well for a smooth finish.
I enjoyed using different fabrics for these small details, letting them reflect the vibrant personalities of the characters.
This seemingly small, meticulous work ultimately enhances the overall artfulness of the quilt.
Embrace Your Creativity: A Journey Worth Celebrating
As I sewed together the last stitch of the Brave Tin Soldier Quilt, I felt immense pride in what I had created.
More than just a quilt, it is a vibrant retelling of courage and love.
I encourage you to embrace this journey, where every block stitched tells a piece of the story.
It’s rewarding to see how a simple piece of fabric can carry so much meaning!
If you’ve enjoyed piecing together this enchanting quilt, I invite you to explore more amazing content on our blog!
There’s a treasure trove of creative ideas waiting for you to dive into.
You can check out an incredible piece I’ve prepared by clicking here.
Remember, every stitch brings us closer to our unique quilting story!