When I think of autumn, I think of the vibrant colors of the leaves as they change from green to hues of red, orange, and yellow.
I remember the crisp air, the smell of apple cider, and the crunch of leaves underfoot.
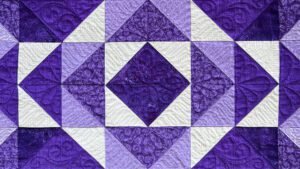
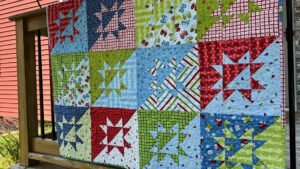
As a quilter, I’ve always been drawn to the classic maple leaf quilt block.
It’s a block that captures the essence of fall, a block that brings back memories of autumns past.
Recently, I’ve been working on a Classic Maple Leaf Quilt Block, and I’m thrilled to share the process with you.
The joy of quilting lies not only in the finished piece but also in the journey of creating something beautiful that reflects the changing seasons.
Dive in with me as we embrace the charm and warmth of this stunning block!
The Elegance of The Classic Maple Leaf Quilt Block
The Classic Maple Leaf Quilt Block is a traditional quilt block that has been around for many years.
It’s a block that is simple yet visually stunning, a block that can be made in different sizes to suit your needs.
For my quilt, I decided to make the block in three different sizes: 6”, 9”, and 12”.
These blocks come together quickly and are fun to mass produce!
This quilt block not only brings a taste of fall into your home but also showcases some basic yet essential quilting techniques.
It’s a fantastic project for beginners, and trust me, the satisfaction of creating a Classic Maple Leaf Quilt Block is unparalleled.
It’ll give your sewing journey a textured charm that’s perfect for cozying up during the chilly months.
Materials You Will Need
- Leaf fabric
- Background fabric
- Cutting mat and rotary cutter
- Quilting ruler
- Sewing machine
- Iron
Now, let’s get down to the details.
For the blocks, you will need the following pieces cut from your selected fabrics:
- 6″ x 6″ Block: 2 squares 3″ x 3″, 3 squares 2 ½” x 2 ½”, and one strip 1 ¼” x 4″ from leaf fabric, and from the background fabric cut 3 squares 3″ x 3″, 1 square 2 ½” x 2 ½”.
- 9″ x 9″ Block: 2 squares 4″ x 4″, 3 squares 3 ½” x 3 ½”, and one strip 1 ¼” x 5″ from leaf fabric, and from the background fabric cut 3 squares 4″ x 4″, 1 square 3 ½” x 3 ½”.
- 12″ x 12″ Block: 2 squares 5″ x 5″, 3 squares 4 ½” x 4 ½”, and one strip 1 ½” x 7″ from leaf fabric, and from the background fabric cut 3 squares 5″ x 5″, 1 square 4 ½” x 4 ½”.
Get Ready for Beginnings
Before you start crafting your Classic Maple Leaf Quilt Block, get organized!
Lay out the materials and tools.
Having all your tools at hand will make the process much smoother and enjoyable.
I love to play some calming music in the background while I prepare my workspace; it sets the mood just right!
Additionally, take a moment to do a little prep work.
Read through the instructions thoroughly so that you have a clear idea of what to expect during the process.
The Classic Maple Leaf Quilt Block is filled with exciting techniques, and knowing the steps beforehand can turbocharge your confidence.
Step-by-Step Instructions for The Classic Maple Leaf Quilt Block:
Now let’s dive into the step-by-step instructions.
Here’s where the exciting part begins!
Follow my directions below the image, and if you want the full pattern, just click the link provided!