Hello, quilting enthusiasts!
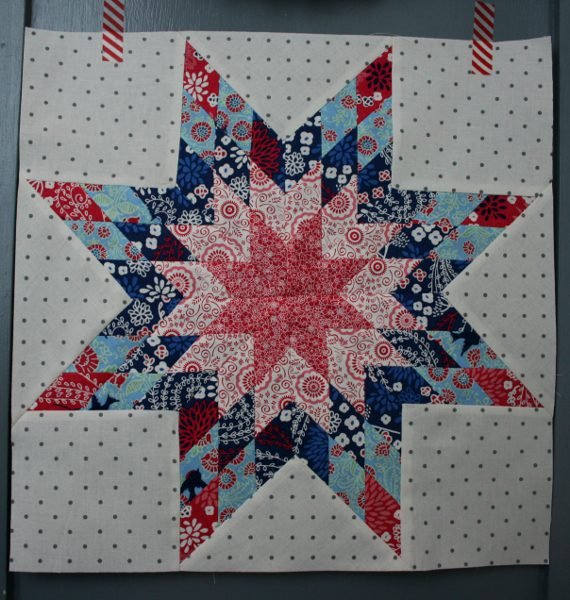
It’s Julie here, and today I’m thrilled to invite you into the world of the Lone Star quilt block, a design that’s as rich in history as it is in complexity.
Renowned for its stunning visual impact and symmetrical beauty, the Lone Star quilt block is a quintessential pattern in the quilting community, embodying a perfect blend of tradition and meticulous craftsmanship.
As we embark on this journey together, we’re not just piecing together fabrics; we’re weaving a narrative that ties us to generations of quilters before us.
The Lone Star quilt block is more than a project; it’s a passage into the heart of quilting heritage, a celebration of the art that has brought together communities and families for centuries.
Join me in embracing this timeless tradition, as we step into the intricate and rewarding process of creating your very own Lone Star quilt block.
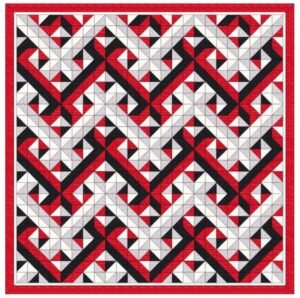
Why the Lone Star Quilt Block is Forever a Favorite
The Lone Star quilt block is more than a pattern; it’s a statement.
Its captivating symmetry and radiant design have made it a beloved choice among quilters for generations.
Choosing to create a Lone Star is choosing to challenge oneself, to dive into a project that requires careful planning and meticulous execution.
Each fabric selection, each strip pieced together, contributes to a striking visual effect that is both bold and harmonious.
The Lone Star is not just a quilt block; it’s a centerpiece, a focal point that draws the eye and captivates the viewer.
Gathering Your Materials
In this creative journey, the selection of your fabrics marks the first step towards bringing your Lone Star quilt block to life.
This stage is not just about picking colors; it’s about envisioning the final harmony of your masterpiece.
You’ll need to choose five fabrics that not only complement each other but also have their unique stand-out qualities.
Think of each fabric as an actor playing a crucial role in your starry ensemble.
The most critical fabric will be the star of the show, forming the center and the radiating points of your Lone Star.
As you transition into cutting your fabrics, remember that precision is key.
This process lays the groundwork for your entire project.
You will cut strips from your chosen fabrics, each strip becoming a building block for your quilt.
Preparation Tips for Success
Before diving in, it’s wise to establish an organized working space.
Gather all your materials close to you, allowing for ease as we create our Lone Star quilt block.
Not only will this streamline your process, but it can also inspire creativity when everything is neatly arranged.
Decide on a layout for your fabrics, imagining how they will interact within the design of your quilt block.
As you prepare your strips, focus on consistency in your cutting.
Uneven strips can complicate the sewing process later on, impacting the overall beauty of your Lone Star quilt block.
Once cut, consider labeling every strip, particularly if you have several colors in play.
This little trick will save time and frustration as you begin the assembly.
Step-by-Step Instructions
Now that you have everything prepped, it’s time to get those creative juices flowing!
Below are the instructions to guide you through the process of piecing together your Lone Star quilt block.
If you need a detailed pattern for reference, I invite you to check out the full pattern at the link below!
Full Pattern: Click Here
Additional Tips for a Flawless Finish
Throughout your journey with the Lone Star quilt block, don’t hesitate to take breaks.
Quilting is not just about speed; it’s about enjoying the process and nurturing your creativity.
Trust your instincts, and don’t be afraid to experiment with colors and placements.
This is your art, and it should reflect your personal style!
It can also be helpful to do a mock layout of your block before stitching it together.
This way, you can become familiar with how each piece complements the others.
Plus, it gives you a sneak peek at the final product, which is always exciting!
Advanced Techniques to Elevate Your Lone Star
Consider incorporating an advanced technique such as Y seams, which adds depth and dimension to the Lone Star quilt block.
While sewing Y seams can be challenging, the resulting effect is well worth the effort.
It allows for precise intersections and crisp points, enhancing the polished look of your quilt.
Don’t be discouraged if you face bumps along the way.
Every quilter, no matter how seasoned, encounters challenges.
The key is to embrace these challenges as part of the learning process!
Remember, each quilt you create tells a story, and your journey with the Lone Star quilt block is no exception.
Celebrate Your Quilting Journey!
As you put the final stitches into your Lone Star quilt block, you stand at the culmination of a journey that’s tested and showcased your skill, patience, and artistic vision.
This block, with its captivating symmetry and complex design, transcends being merely a piece of fabric; it’s a tangible representation of your creative spirit and dedication.
Your completed Lone Star block is not just an accomplishment; it’s a continuation of a story as old as quilting itself, a personal milestone in your own quilting journey.
And there’s so much more waiting for you to explore!
Dive into the treasure trove of quilting knowledge we’ve curated for you; I can’t wait for you to discover amazing content by unlocking the next adventure here.
So go ahead, quilt away!