


Have you ever stumbled upon a project that just instantly inspired you?
That was my exact reaction when I first encountered the Enchanted Garden Quilt.
I remember sitting on my couch one rainy afternoon, sipping on my favorite chamomile tea, as I flipped through a quilt magazine.
The intricate designs of the flowers and colors were nothing short of mesmerizing.
It felt like the quilt was whispering a creative challenge to me, urging me to bring it to life.
After gathering my courage, I decided to take the plunge and dive into creating the Enchanted Garden Quilt.
It turned out to be an adventure filled with unexpected twists and plenty of laughter.
Not only did this quilt become a statement piece in my living room, but it also allowed me to express my creative side like never before.
Today, I’m excited to share with you this fantastic project that I believe will spark joy in your crafting journey!
Unlocking the Secrets of the Enchanted Garden Quilt
The Enchanted Garden Quilt is not just a beautiful design; it is an excellent introduction to quilting techniques, especially for beginners.
The beauty of this quilt lies in its ability to blend different fabrics and colors into a cohesive piece that tells a story.
As you explore this pattern, you’ll find that it encourages you to think outside the box and be playful with your choices.
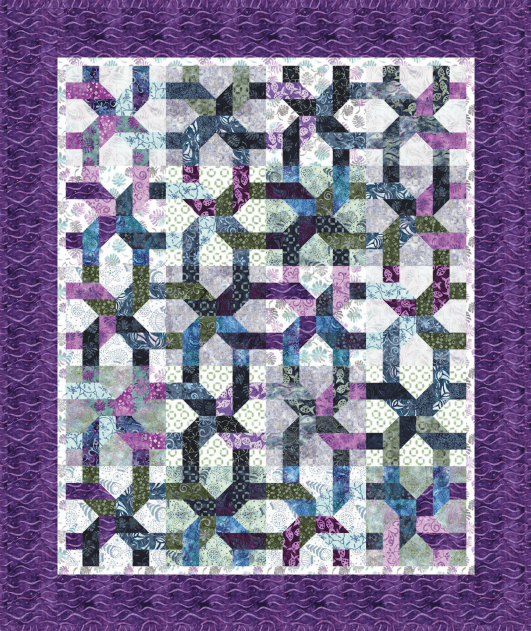
This quilt represents a world of flora, each patch symbolizing a different aspect of nature’s bounty—think whimsical flowers and sprawling vines.
Creating the Enchanted Garden Quilt isn’t merely a project; it’s an experience that will invite you to immerse yourself in the beauty of fabric and thread.
The Floral Fabric: A Feast for the Eyes
One of the best parts of creating the Enchanted Garden Quilt is selecting the right fabrics.
The quilt shines best when you choose vibrant colors that speak to you.
I recommend visiting local fabric stores or browsing online for floral patterns that feel enchanted and vibrant.
If you’re feeling daring, you can mix and match various prints, textures, and colors.
Just remember, the key to a well-balanced quilt is harmony—let your fabric selections tell a story, and don’t hesitate to express your personality through your choices.
Materials
- Quilt backing fabric (2 yards)
- Quilt batting (2 yards)
- Assorted cotton fabrics for patches (1/4 yard each)
- Quilting thread
- Rotary cutter
- Cutting mat
- Quilting ruler
- Sewing machine
- Iron
Preparing for Your Creative Journey
Before you start sewing your Enchanted Garden Quilt, it’s important to prep your workspace.
An organized area is crucial for a smooth crafting process.
Make sure you have all your materials laid out in a way that’s easily accessible.
This will help you focus on the fun of creating without distractions.
Next, take your time to wash and iron your chosen fabrics.
This step is vital, as it helps prevent shrinkage later on.
An ironed fabric also makes cutting easier and more accurate, ensuring that your pieces fit together perfectly!
Step-by-Step Instructions:
What comes next is the fun part—the step-by-step instructions on creating your very own Enchanted Garden Quilt!
You’ll find all the detailed steps outlined below the image, and remember, you can access the full pattern via the link provided.
Full Pattern: Click Here
Additional Tips
As you embark on the delightful journey of creating the Enchanted Garden Quilt, remember to take breaks when needed.
It’s easy to get caught up in the project, but pacing yourself will enhance your enjoyment and prevent frustration.
I usually schedule crafting sessions around my favorite shows, combining the joy of quilting with entertainment!
Also, don’t be afraid to make mistakes!
Quilting is a learning process, and sometimes, those happy accidents can lead to the most beautiful results.
Embrace your creative journey with an open heart, and remember that how the quilt looks when you finish matters less than the joy you felt creating it!
Exploring Advanced Techniques
If you feel ready to take your skills to the next level, consider integrating some advanced techniques into your Enchanted Garden Quilt.
For instance, you might try free-motion quilting or even hand-stitched embellishments for an extra touch of flair.
These techniques add a layer of complexity and uniqueness that will truly make your quilt stand out.
This quilt provides the perfect backdrop for experimentation, helping you evolve as a quilter.
Each advanced technique learned is another tool in your crafting toolbox, further enhancing your future projects!
Celebrating Your Quilting Journey
As you stitch together the squares of your Enchanted Garden Quilt, I hope you find joy in every cut, every seam, and every floral patch you create.
Celebrating your quilt’s progress—and perhaps even its imperfections—will foster a deeper connection to your craft.
Take moments to admire your work, and appreciate the time and creativity invested in each square.
And if you find yourself inspired to continue this creative journey, I invite you to dive into the array of wonderful content on our blog!
There are so many gems waiting to be discovered, including another captivating piece you can explore right over here.
You’ll definitely find something to ignite your imagination!
Bringing the Enchanted Garden Quilt to life is both a celebration of creativity and a commitment to your craft.
Reflect on how far you’ve come, and cherish this beautiful creation that reflects your journey.


