


There’s something magical about diving into a new quilting project, isn’t there?
I remember the day I stumbled upon the Joyful Garden Quilt pattern.
The moment I laid my eyes on its vibrant colors and intricate designs, I felt a rush of excitement!
It was enticing, pulling me in, whispering tales of cozy nights snuggled up with a creation made by my own hands.
As I gathered my fabrics, I could already picture the joy it would bring to my home.
Through winding roads of creativity and moments of frustration, each stitch would be a little piece of my heart.
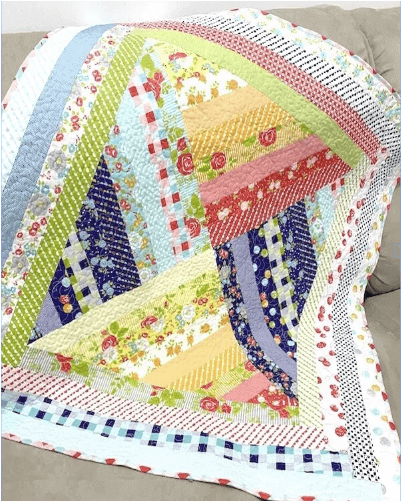
What I love most about the Joyful Garden Quilt is its lovely floral motifs, inviting the warmth of spring into your space.
This quilt isn’t just a pattern; it’s a celebration of colors, shapes, and the beauty of creativity woven together.
So, grab your supplies, and let’s embark on this charming journey!
Stitching together Mountains of Inspiration
The Joyful Garden Quilt pattern draws its roots from the beauty of nature, mimicking the delightful blooms found in a vibrant garden.
With each piece of fabric—whether it’s a bright sunflower yellow or a soothing lavender—you’ll feel like you’re creating your very own floral paradise.
I often find inspiration in my surroundings, and this warm quilt pattern reminded me of the sunny afternoons spent wandering through my local botanical garden.
What’s more, each flower you create brings a story—a reminder of joyful moments spent in nature.
It’s more than just a project; it’s a connection to the earth, to moments lived and memories made.
The Joyful Garden Quilt serves not only as a quilt but also as a canvas where you can express your creativity and love for flowers!
A Color Palette to Make Your Heart Sing
When choosing your fabric for the Joyful Garden Quilt, I recommend opting for vibrant and cheerful colors that resonate with you.
Think of colors that make you smile—bright blues, cheerful yellows, and calming greens.
They not only enhance the beauty of the quilt but also elevate your mood while working on it.
If you’re feeling adventurous, consider mixing different patterns and textures!
The interplay between solids and prints can create stunning contrasts and lend depth to your creation.
Remember, the Joyful Garden Quilt isn’t just about the final product; it’s also about the joy and creativity you express while making it.
Gather Your Materials
- Fabric in various colors and patterns (at least 1 yard of each)
- Quilting cotton for the backing layer (2 yards)
- Batting (medium weight recommended)
- Rotary cutter and mat
- Quilting ruler
- Sewing machine
- Thread in colors to match your fabrics
- Needles suitable for quilting
- Iron and ironing board
- Scissors (for trimming any threads)
Get Ready to Sew!
Before we dive into creating the Joyful Garden Quilt, it’s essential to set up your workspace.
Find a well-lit area where you can spread out your fabric without feeling cramped—this will save your sanity during the piecing process!
Having a clean and organized space can make a world of difference in your creative flow.
It’s also a great idea to prep your fabric by washing and ironing it beforehand.
Pre-washing helps prevent any shrinkage later on, and it’s a nice way to feel fresh and inspired before embarking on this beautiful project!
Step-by-Step Instructions:
Now that you’re all set up, we can jump into the detailed steps for the Joyful Garden Quilt!
Use the image below as a reference, and remember, if you need the complete pattern instructions, you can find them via the link provided!
Full Pattern: Click Here
Additional Tips to Keep You on Track
As you work through the Joyful Garden Quilt, don’t rush!
Take your time to enjoy the process.
If you feel yourself getting frustrated, step back, stretch, or even take a break.
The beauty of quilting is that it’s meant to be a delight, a form of relaxation.
It’s a creative journey, not a race!
Also, keep your cutting tools sharp!
Dull blades can mess with both your fabric pieces and your mood, leading to frustration.
Invest in a quality rotary cutter and change out your blades when they start to feel dull.
Your future self will thank you for it!
Consider Incorporating Advanced Techniques
If you’re feeling bold, think about incorporating some advanced quilting techniques into your Joyful Garden Quilt!
Techniques like free-motion quilting or adding appliqué elements can give your quilt that unique twist.
Incorporating different quilting styles will not only enhance aesthetics but also allow you to expand your crafting skills.
Don’t shy away from experimenting!
It’s all part of the fun—try using different quilting patterns and methods in various sections of your quilt to create visual interest.
This project could be a fabulous opportunity to stretch your abilities!
Celebrate Your Creative Journey!
As you wrap up your beautiful Joyful Garden Quilt, take a moment to step back and admire your handiwork.
Celebrate every stitch that brought you one step closer to your final creation.
Each quilt we make tells a story, reflects our personalities, and showcases our emotional journeys.
Remember, you didn’t just create a quilt; you brought to life your unique artistic vision!
Thanks for joining me on this colorful adventure!
If you’re hungry for more crafting inspiration, my blog is bursting with exciting content.
You never know what delightful surprise you might encounter; I’ve prepped an incredible piece for you to discover by making a detour here.
Dive in—I promise you won’t regret it!
In closing, the Joyful Garden Quilt is a wonderful way to express your creativity, whether you’re a seasoned quilter or just starting out.
I hope you found lots of motivation and joy in this article.
Happy stitching!


