


Every crafting journey starts with a spark of inspiration, doesn’t it?
For me, it was one sunny afternoon when I first stumbled upon the Joyful Star Quilt pattern.
I remember sitting with a cup of tea, flipping through a vibrant craft magazine, and being captivated by the bright colors and geometrical harmony of the quilt.
It seemed like it was calling out to me, inviting me to dive into the world of quilting.
I knew right then that this was not just a quilt; it was an adventure waiting to unfold!
As I embarked on this journey, I quickly realized that the Joyful Star Quilt pattern was more than just stitching fabric together.
It became an avenue for creativity, self-expression, and a way to unwind from the hectic pace of life.
I cannot emphasize enough how the rhythmic motion of cutting and sewing fabric can relieve stress.
It’s like a form of meditation, only much prettier!
So grab your fabric stash, because we’re diving headfirst into the fabulous world of the Joyful Star Quilt, where each stitch is a step toward happiness.
Understanding the Magic Behind the Joyful Star Quilt
The Joyful Star Quilt pattern isn’t just named for fun; it embodies a sense of joy and radiance!
Each star block symbolizes hope and brightness, making it a perfect project for both beginners and advanced quilters alike.
The spectacular arrangement of stars creates a visual rhythm that can transform any space into a cozy sanctuary.
Whether you choose a colorful palette or stick with classic shades, each quilt is unique, reflecting not only your personality but the love stitched into each seam.
Furthermore, this quilt pattern allows for endless variations.
You can mix and match different fabrics, experiment with quilt sizes, or even give it your style twist with decorative borders.
The flexibility in design gives me a thrill, knowing I can create something that feels uniquely mine.
That’s the beauty of crafting — it allows us to become authors of our own creations!
Tools of the Trade: Materials You’ll Need
- Assorted cotton fabric (for the star blocks and background)
- Rotary cutter and mat
- Ruler (for precise measurements)
- Thread (matching colors and a neutral)
- Iron and ironing board
- Cutting scissors
- Batting (for the quilt’s cozy filling)
- Backing fabric (to finish the quilt)
- Safety pins or basting spray (for layering)
Gathering your materials can be a delight in itself!
I personally love to stroll through fabric stores, running my fingers over the various textures and colors.
It feels like diving into a candy store for quilters!
However, if you’re ordering online, make sure to choose quality cotton fabric, as it drapes beautifully and stands the test of time.
As I prep my materials, I also recommend organizing your workspace.
A clutter-free area increases creativity and reduces the chance of misplacing your little scissors or losing track of those tempting thread spools.
Lay everything out in a way that makes it easy to grab what you need.
Your future self will thank you!
Prepping for Quilting Fun!
Before diving into the beautiful world of the Joyful Star Quilt, take some time to prep.
Start by washing and ironing your fabrics to pre-shrink them.
This little step ensures your quilt keeps its beautiful shape over time — nobody wants a shrunken masterpiece!
Also, cut your fabric into the required sizes as per the Joyful Star Quilt pattern.
This step can be repetitive, but I often find it meditative.
Just put on your favorite podcast or some upbeat tunes, and before you know it, you’ll have everything cut and ready to transform into a stunning quilt!
Step-by-Step Instructions:
Now prepare yourself for the fun part!
Below, I will share the step-by-step instructions for creating your very own Joyful Star Quilt.
And to access the full pattern with all the details, you can click the link below the image.
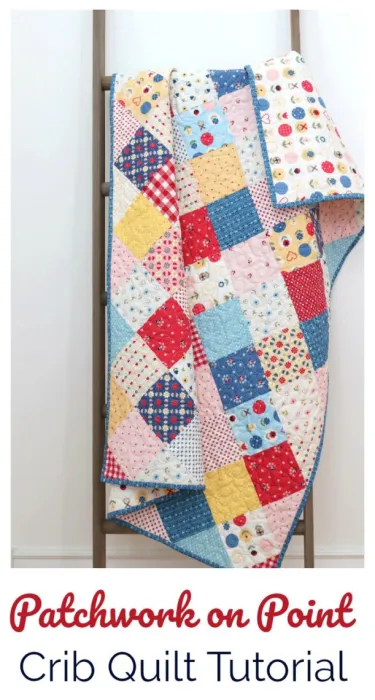
Full Pattern: Click Here
Additional Tips for a Smooth Sailing Quilting Experience
One of my favorite tips for sewing my Joyful Star Quilt comes from experience: take your time and enjoy the process.
It can be quite tempting to rush through the stitching, especially when you’re excited.
But trust me; each seam deserves your attention.
Doing so ensures that your quilt turns out just as beautifully as you envisioned.
Moreover, don’t hesitate to experiment a little along the way!
Whether it’s playing with the arrangement of your blocks or feeling bold enough to mix patterns, let your creative spirit shine!
Remember, perfection is subjective; what matters most is the joy each piece brings into your life.
Exploring Advanced Techniques for the Joyful Star Quilt
If you’re comfortable with basic quilting, now’s the time to get a bit adventurous with your Joyful Star Quilt!
One technique I love to incorporate is free-motion quilting.
It allows for beautiful designs and gives your quilt a personalized touch!
You can draw swirls, stars, or whatever your heart desires, making each quilt a true reflection of yourself.
Additionally, consider adding some hand-stitching elements or embroidering messages into your quilt.
These details can create heartfelt memories within the quilt, making it a treasure piece for your family.
It just adds that special layer of love that we all appreciate!
Celebrating Your Quilting Journey
As you wrap up your Joyful Star Quilt, take a moment to celebrate your incredible achievement!
Each quilt tells a story, and yours is no exception.
You poured your heart and skills into every stitch, and that deserves a huge round of applause.
So go ahead and showcase your quilt proudly because it’s just as much about the process as it is about the final piece!
If you’re feeling inspired and ready to explore more creative adventures, I encourage you to wander through the other amazing articles our blog has to offer!
There’s a treasure trove of ideas waiting for you to discover.
And I’ve prepared an incredible piece you can unfold by clicking here.
You won’t want to miss it!
In conclusion, my journey with the Joyful Star Quilt has been nothing short of delightful.
Each stitch, each color choice, has my creative essence infused in it.
Now, as you embark on your journey, remember to enjoy every moment, embrace imperfections, and create something that brings you joy!


